Friday, December 5, 2014

Sewing....and a pattern review

I have been on the hunt for the perfect tunic pattern for months - nay, years!  I love the look of a soft tunic with coordinating leggings.  I can wear the look to work and you know what?  It's the closest thing to being in my pajamas, and still looking presentable!

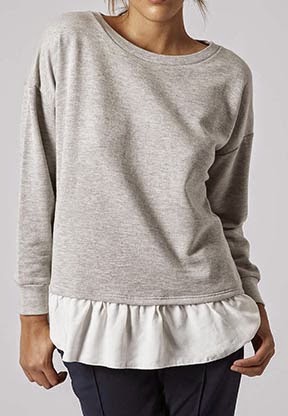
So when I glanced at the New Look pattern rack at my local Walmart a few weeks ago, lo and behold, New Look 6323 jumped up and said "Hey!  Here I am!"  Since wally world discounts patterns, for $2.99 it was worth a shot.

The cut of this tunic is simple, it flows nicely over the body - like love, it covers a multitude of sins! (1Peter 4:8)  The pattern works well with any knit fabric - I've made three of them so far, with a 4th waiting to be cut out in the morning!  I made size XL as the pattern runs, and it fits more like a 1x.  The arms are a little long, but I like it that way, and better too long than not enough!  It takes less than two hours to create a top.  I've made the leggings out of a heavier cotton/poly/spandex blend - they fit more like a pant than a super-snug legging, but that's ok too.

Here's the pattern...


The first tunic I made, I used the neckband.  Ugh, what a pain that was!  And for me, the neckline was a little low.  So I changed the neckline to use a facing instead, and raised it about 1.5".  I'll make another adjustment on this next one, and that is to bring in the back neckline a little bit, it's kind of wide.  All versions so far are the longer hemline, v-neckline, and long sleeves.

I don't have a photo of the first tunic, and it's in the laundry right now, I'll get one tomorrow...

The second tunic was made from a kitten-soft silvery gray and black velour - not a whole lot of stretch to it, and because of that the arms are a little snug.  Looks incredible with black leggings and boots.  A silvery gray scarf finishes the look.


Oh and look, I made earrings to match!  Dark gray, light gray, and white pearls, and crystal AB beads.

Next is a delightful rayon/poly blend, sooo soft (I have this thing for softness!) and very stretchy.  Found it on sale at Joann's for like $5 a yard.

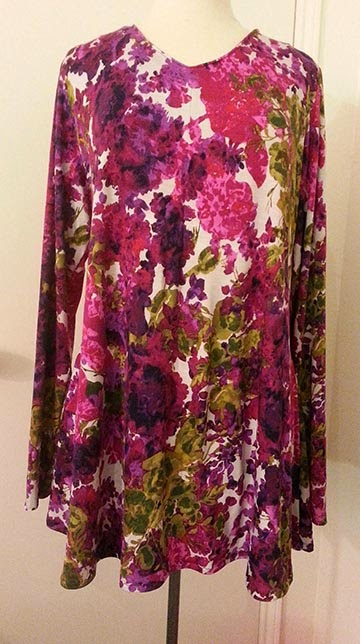
And yes I made matching earrings, but no photo... I'll edit in the morning.  I also made the leggings out of a heavier knit that matches the darkest purple.  I could also wear this with gray, black, or dark olive.  And I have enough of the print fabric left over for an infinity scarf!

Another pattern I'm working with is Vogue 8691.  I'm using a black and turquoise lace over a solid turquoise knit.  I'm a little bogged down with this, as it's like making 2 shirts... but that's another post!


I have another fabric upstairs in the sewing room that is just itching to be cut out in the New Look pattern - but that's still another blog post!

I'll leave you with these words of wisdom - measure twice three times, cut once!  The first set of measurements are your own.  The second set of measurements are the pattern - measure edge to edge and remove seam allowance from each piece - so if underarm to underarm on the front pattern piece is 22", and you want a half-inch seam allowance, that will have a finished width of 21".  The third set of measurements are the actual garment measurements.  Patterns don't always run true to their size chart, so measure, measure, measure!

What pattern is your favorite, that you make time and time again?

Saturday, November 8, 2014

In the sewing room...

So I've started doing a little of what might be called "selfish sewing" - that means I'm making something just for me, not for someone else, for sale, whatever.  And it's nothing fancy, but I'm pretty pleased with the results.

Doing some window shopping on Net-a-Porter, I came across this shirt, and really liked the idea of the ruffle peeking out from the bottom.


Not so much the price tag!  I think it was around $50 or so, and I just can't see that.  So the creative juices started flowing, and here's what I started with:


A length of pretty chiffon and a thrifted long-sleeve tee.  Chiffon I think was less than $5 a yard, and the tee was $2.  So I'm in it for $7 so far.

My first step is to measure the hem of the tee.  Remember, it stretches, and you'll use that stretch later.  After measuring, I added about 12" to the number, allowing 6" of stretch for front and 6" for the back.  You'll see why.


I figured I wanted about 3" of print showing under the shirt.  I could have gone wider, this was just a number I thought would work nicely.  Take in to account the inch or so from the bottom of the tee to the hem stitching, and a tiny bit that will be serged off.  Cut a band DOUBLE that.  So 3" to show, and 1"-ish for hem, and I cut an 8" wide section of chiffon.  You can tear it also, that way you are straight on the grain.  (Note - depending on your yardage, you may need to sew two pieces together to make one long band, that's what I had to do.  Just make sure the pieces are even for front and back.)


Then fold it in half, WRONG sides together!  You can press it if you like.  Pin together.  Notice the seam line, this was because my length of chiffon wasn't long enough to go around my wide butt the hem of the tee.  Just make sure they're two equal lengths for front and back, you'll see in a sec.


Handy with a serger?  Then you can probably skip pins.  If not, remember to REMOVE the pins before you get to the mechanism!


Now it's time to pin!  Place the serged edge along the hem on the inside of the tee.  If you used two sections of chiffon, make sure seams meet.


You will have more band than tee.  The way I did this was 1) pin each side seam.  Stretch to where the tee is the same as the band and 2) pin the center.  Then 3) pin halfway between the side and center... and so on.

Clear as mud?  Lookey here.


As you sew the band, you're going to gently stretch the tee to take up the slack.  And this is easy, because you have the twin-needle hem stitching as a guide, just stitch right in the middle of the two.  Slowly.  Really.


And that's it!  I also made a matching infinity scarf (that's my next tutorial) and wore the outfit to church the next morning.  Compliments all around!  Any questions, let me know and I'll answer the best I can.  Maybe a version in lace next?


Sunday, July 20, 2014

Refinishing furniture... not as easy as it looks!

So I have some nice furniture pieces that I obtained many years ago - very nice quality.  But after kids, dogs, country life... it all took a toll on the lovely finish.  So to go along with my French Country feel, I decided to paint and then wipe stain on it for an antique-y vibe.

Other bloggers make it look EASY.  It's NOT.  It takes time, and lots of it.  I spent at least 8 hours on this one piece.  That doesn't include the trips to Hobby Lobby for the fixture, or Home Depot for the drill bit.  And it was hard work!  But I think it paid off.

I followed this blog entry, over at Sweet Pickins - How I Glaze Furniture. The one thing I did differently is not put the stain in the glaze, I just wiped the stain on the cabinet.  I have a matching coffee table to work on as well, and I'll definitely add the glaze.  You have to work really fast with just stain.

Let's have some pictures!

This is the cabinet/side table/end table/whateveryouwannacallit before - sorry for the bad photos, they're all from my phone... and choosing a piece with beaded board in the front and back was probably not the best choice for a first-time project, but I'm happy with it!

Let's do a light sanding, although the paint I used, Behr Premium Plus, really didn't require it.
After sanding, wipe it down with a damp rage - I used a chunk of an old t-shirt.

This is the paint color - sort of a light vanilla, called "Innocent."

Let's get it started!

I used two coats.  The first coat was not very smooth, kind of blotchy, but that's ok.  Second coat pretty much covered everything.

Now the staining part - no photos, because my hands were in rubber gloves, and I had to work very quickly in the short time between wiping it on and rubbing it off.  Hint:  Be careful where you sand for distressing.  If you sand over the paint, like on a flat part, your stain will catch in there.  Be sure you have straight lines!  I used Minwax Jacobean - the same stuff I used on the basket from a few weeks ago.

Here is the difference between painted, and stained.

Time to add the new fixture - the original was just a plain wooden knob.  I think this one adds more character, and it was half off!  Also notice how I made sure the stain was kind of "puddled" at the bottom, because that's where dirt and stuff would be if this were an older piece.


Finally, about 2 pm Sunday afternoon, after starting around 11 Saturday morning, I'm done!  I love the hardware, and think it will make a very pretty place for... hmm... not sure.  Maybe the tv will go on top of it.


What do you think?


Saturday, July 12, 2014

Back from the fabric outlets....

...and my feet hurt!  I was in and out of every outlet store in Dallas (off Harry Hines and Perth Street) for what seemed like - wait, it was - hours.  Finally, at the new location of Wherehouse Fabrics (where Best Fabrics was, til they moved across the street) I found it!  A lovely tan-based jacquard with a floral print.  And 25% off!  As an aside, I found a nice rug for the living room too!

Here's the rug and soon-to-be curtains.


I also picked up a few pieces of chiffon - I'm going to try my hand at making some scarves!


So... yeah, tomorrow I'm going to tackle the curtains.  Updates as they happen!

A quick little project....

Here's a quickie project I did over 4th of July weekend.  I had a shelf that had been hanging around for years - honestly, like 15 years - and I always thought of doing something with it - but what?

Since I had painted an old dresser for my bedroom, I decided to paint this shelf the same color.  At Home Depot I found some vinyl-covered cup hooks for dirt cheap, added those, and lookey lookey, a new way to display my scarves!  Previously, my scarves were hanging in my closet on shower curtain rings, but that never worked well - the rings all slid to one end, and before long, the scarves slid off the rings.  This way, they're nicely hanging, and I can see what's there!

Before painting, I used a spray-paint primer, since the original shelf was stained and I didn't want any bleed-through.  Then two quick coats of paint - I used Behr Premium Plus Ultra - it's supposed to have primer built in to the paint, but I'd rather err on the side of caution, and used a Krylon spray primer.

Here's the final result!  Sorry it's just a phone photo.... but you get the drift!  It looks crooked, but... yeah, it might be.  Hanging around all those years... oh well, I like it.


I have a few other projects waiting in the wings - refinish another dresser, a coffee table, and an end table, and a door.  I was given (or swapped rather!) a 36x80 steel exterior door in exchange for a western-style big decorative hook.  Since my scheme is going French country, it just didn't fit, and I knew someone who would love it.  The door is going to be my cutting table.  All it needs is a little sanding, and a coat or two of glossy spray paint.  And the desk, oh yeah, the desk... another find for my sewing room... Lots to do, and limited time.  

Off to be creative....

Saturday, July 5, 2014

Up and Running!

Umm... yeah, so it's been awhile.  Hey, what's a few years between friends?

In the past two years I've done a few things.  Returned to school - studying for my certification as a paralegal, and lemme tell ya, it ain't easy.  Keeping an average above 3.5 though.  Yay!

My son has officially moved out.  *sigh*  It's hard when the baby birds spread their wings and leave the nest, but it's a good thing.  He's involved with Heartland Master's Commission and will be finishing his third year this fall!  Then he'll be looking for a position as a worship leader.

I think the biggest issue I dealt with in the past two years is breast cancer.  Only through God's grace was I diagnosed with a non-invasive type, and only had to have a lumpectomy to remove the cancerous spot, and six weeks of radiation treatment.  No chemo!  So far, everything is great, and I have my one-year follow up mammogram in August.  Ladies, get your mammograms!

Ok, now - I'm reviving this blog because I'm getting started in a lot of DIY projects.  Painting, staining, sewing, all are on my plate for the rest of the summer, so my place of residence can look like a home.  So be prepared for (duh duh duhhhhh....) tutorials!

And here's my first - staining a basket!

I'm a huuuuge thrifter.  I don't think I've bought anything new (well, I got a new car, kind of an "I survived" gift to myself) in ages.  I find designer fashion at some great thrift stores for pennies on the dollar.  Furniture?  Ha.  Wait til you see what I'm a-gonna do.

Today I went shopping for a big basket, because I'm the type who kicks her shoes off right after coming inside.  I'm just not a big "shoe-wearer" so off they go.  And I needed a better way to keep them together.  Off to the local thrift shop, and voila!  I found a big basket for all of two bucks!  (And some toile and ticking chair cushions, but that's another post!)

I hated the color, so out came the stain!  I used Minwax in Jacobean - it can get really dark with multiple layers, but I just wanted to knock the color down a bit.

Ok, step one - make sure everything is covered with a plastic drop cloth, because this stuff... uh... stains!  You'll also need a cheap brush - you're gonna mess it up digging into all the little crevices, so an expensive brush is not necessary.  Finally, a clean rag to wipe down the basket.  I used an old t-shirt.  Of my son's.  And he's not here *sniff*....

Here is the basket, fresh from the thrift shop.  It has that almost orange-ish color that really has no personality.

I cleaned it out thoroughly, then went to town!  The stain is like water - I was really surprised how much I used, about 3/4 of a small can.  I guess wicker is dry, and soaks up the stain like a sponge!

Here's the bottom - I did this part first, then flipped it over and did the other side.  You can already see the stain bringing out some nice detail.  I only wiped it lightly with the cloth, as I wanted to keep a good bit of the stain on there.


Remember I said you have to dig in to make sure everything gets stain on it?  Smush that brush in there!


The final product!  Sitting on the porch outside, drying.  Be sure to let it dry at least overnight in a dry climate, longer in a humid climate.


What do you think?  I like it.  I put extra stain along the edges, just for... cuz I liked it.

Pin it!